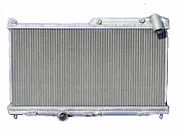
When my '94 RX-7 starting leaking coolant, I discovered it was due to a deteriorated plastic radiator inlet. Seeing as how the 3rd gen RX-7 has such a bad reputation for its cooling system, and that I now live in north central Texas with 115� summers, I decided to replace it with an upgraded aftermarket version. I read some good reviews of the Koyo radiator, and it was a good deal cheaper than the Fluidyne, so that's what I went with. I was expecting a simple bolt on, no modification replacement. Well, I was wrong. Because the radiator is a good deal thicker than the stock radiator, there were clearance problems between the radiator and the parts that were supposed to fit above it. Below is a summary of the changes that I had to make to the car to allow all the parts to fit. This is not meant to be installation instructions, but rather a guide to let you know what you're getting into if you decide to replace your radiator with the Koyo version.
I guess the first step is to remove the original radiator. This should be straight forward enough. I don't have a shop manual, so I don't know the recommended method, but I did this by removing the air box, intercooler, and battery box from above the radiator, then undoing the two nuts that hold the radiator on, and then just pulling it out. You'll have to remove all the associated hoses and disconnect a few wires, but these should all be pretty self evident. Also note that the fan assembly will stay attached to the radiator when you pull it out.
Now, with the old radiator out, it's time to install the new one. You'll need to pull the fan assembly off of the old radiator and install it on the new one, as well as the little rubber covers that go on the pegs at the bottom of the radiator. Also needed are the brackets that are used to bolt the radiator to their mounts, but I had to modify these a bit. Because of problems with clearance of parts above the radiator, I tried to make the radiator fit down in as far as possible. Since I wanted to keep the rubber mounts to maintain the radiator isolated from the frame vibration, I drilled holes in the radiator bracket, as opposed to modifying the mounts.
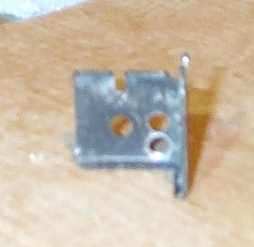
The hole in the center of the bracket is the original hole. When installing the brackets onto the Koyo radiator in the same manner as they are on the original, this leaves the radiator sitting up pretty high. I tried swapping the brackets from one side to the other, and reverse their orientation, but this ended up hitting the frame of the car when I tried installing it. So, I drilled the top hole on the right. This got the radiator to a good height, but the bracket was not far enough toward the firewall to attach to the radiator mount. So I then drilled the hole that you see on the bottom right. If you're doing this installation on your own, you may want to try that hole first.wood phone casesmoved here
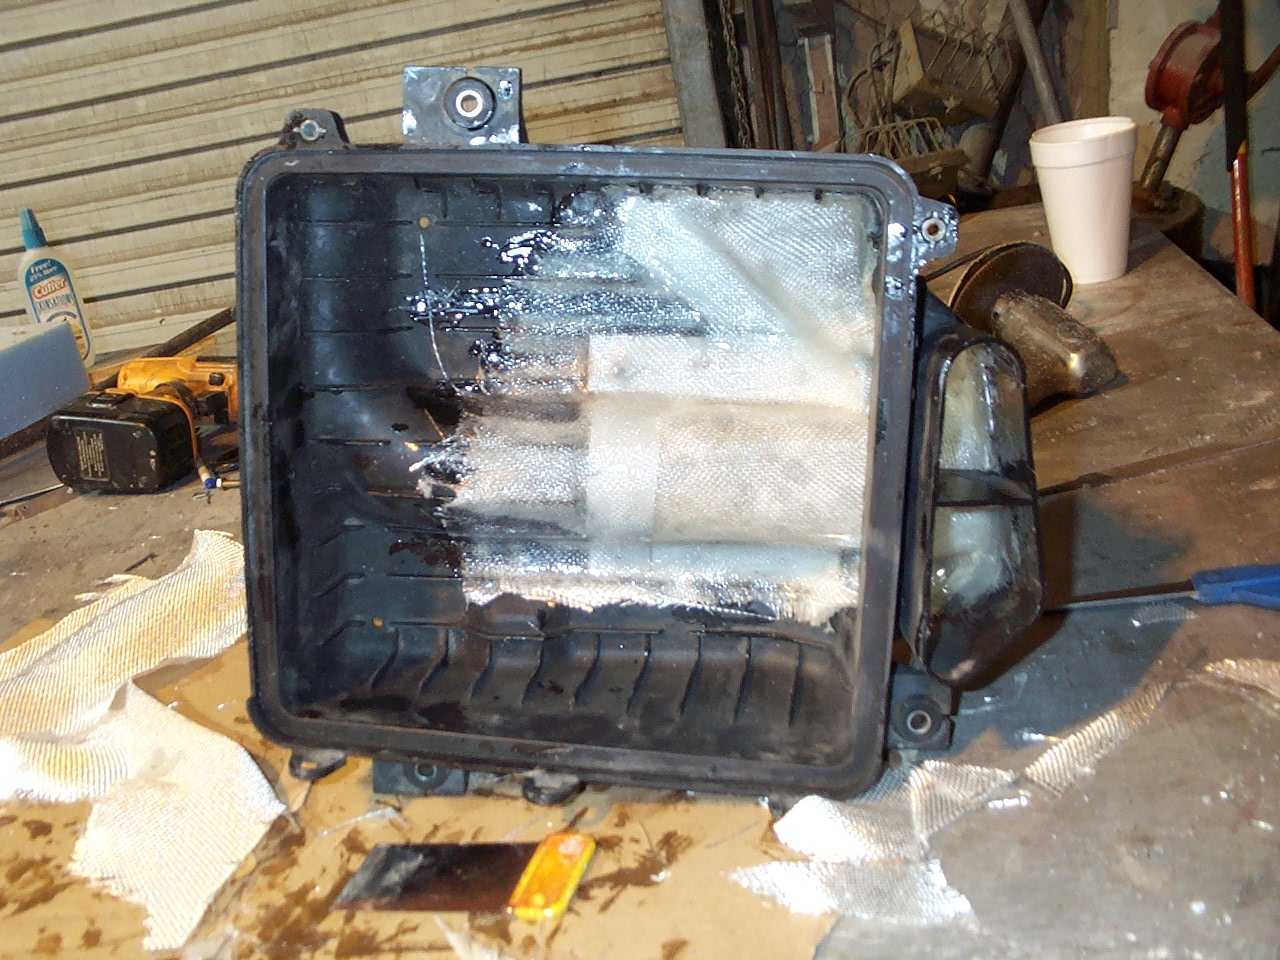
With the radiator installed, there are several interferences that need to be taken care of in parts above the radiator. On the driver side, the intercooler and cool air intake need to be modified. There's a bracket that holds the intake to the intercooler. Unfortunately, this bracket ends up hitting the back of the fan motor when you try to bolt everything back in. I also modified the cool air intake duct itself to give more clearance between it and the fan assembly. I don't know if this modification was necessary, because I made the cuts before I redid the radiator brackets, but since I already had the cuts, I decided to give the extra clearance. Below are pictures of the modifications I made to the cool air intake and the lower driver-side bracket that connects it to the intercooler.
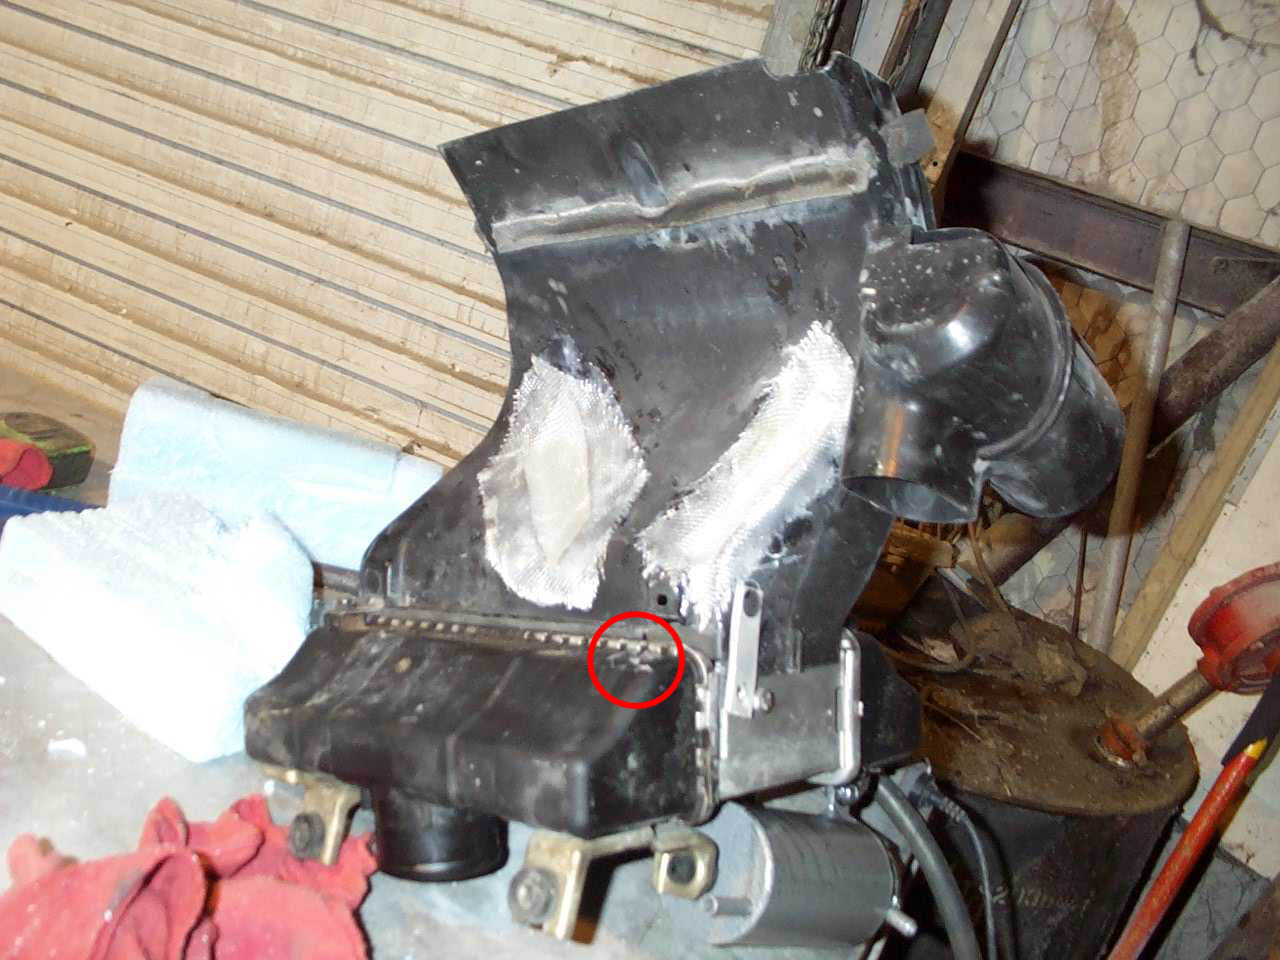
Cool Air Intake and Intercooler with Red Circle Around Removed Bracket
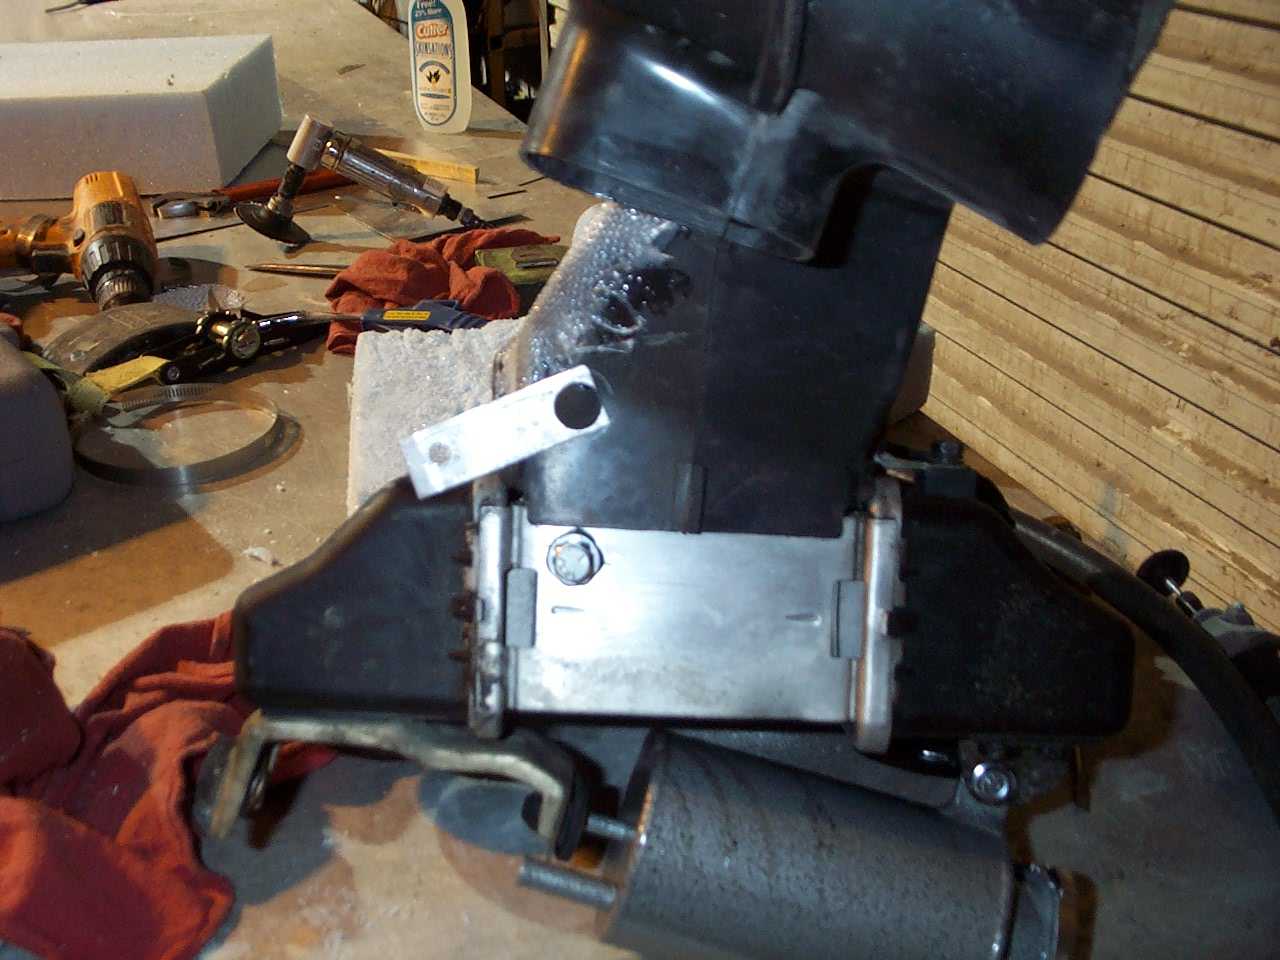
Modified Bracket connecting Cool Air Intake to Intercooler
Modifying the bracket was pretty easy. I just cut it off with my Dremel, and then used JB Weld to bond a nut on top of a washer to the intercooler. The washer was to give some extra clearance so that a bolt could go all the way through the nut. Be sure to clean the metal very well before attempting to use the JB Weld. I sandblasted everything. I made the bracket just by cutting some metal to size and drilling it. Because I was using thin metal, I bent it in half first. But that wouldn't be necessary with a thicker piece. Also, after I took the photo above, I built up a bunch of JB Weld around the nut. I did this to give it more surface area to bond to so that it wouldn't come off.
The modification to the cool air intake was simply cutting away the area where there was interference, and then covering it with fiberglass. I first did one layer of fiberglass on the outside, so that I could push it into the duct and let gravity hold the shape. Once that cured, I layed up another layer of fiberglass from the inside. I made sure that both the inside and outside layer had about an inch lip outside the hole. The resin that I used does not bond very well to plastic, so having the glass enclose the hole from both sides gives a good mechanical connection where the patch should not come off. I also sand blasted the duct before I bonded the glass to it, to try and improve the bond.
The most involved modification to a part was made to the airbox. The stock air box hit both the fan assembly and the radiator hose. The solution was simply to cut out the area where the parts interfered, and then build them back up with fiber glass. Below are two photos showing the modifications.
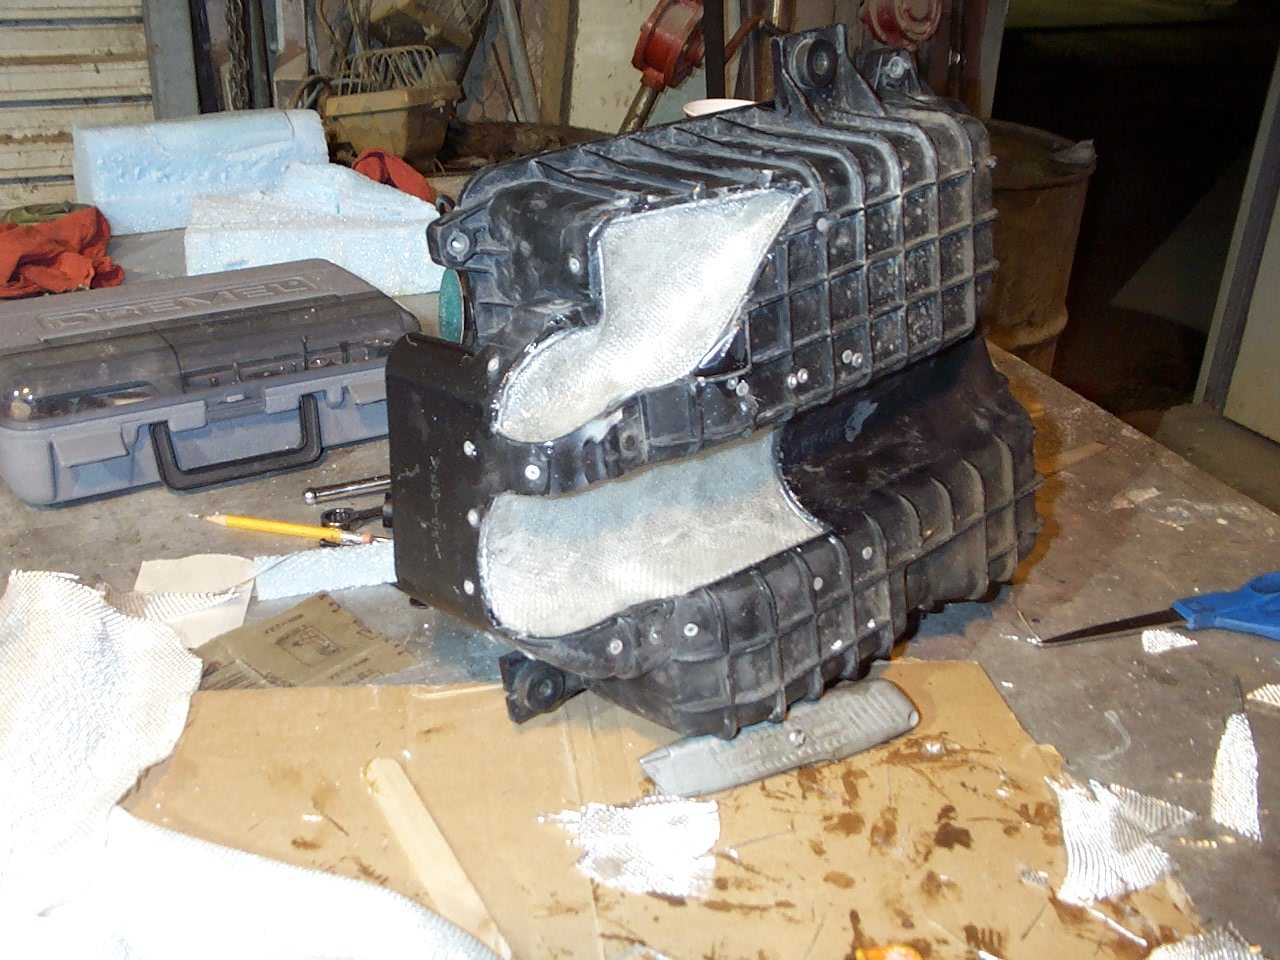
Airbox from Bottom
Airbox from Top
I made the cuts simply by putting the box up to where it needed to be installed, and eyeballing it. I only did a little at a time, test fitting it until it worked, so that I removed the least amount possible. The most time consuming part came next. Because the resin I was using does not bond well to plastic, I decided to rivet metal strips to the airbox surrounding the hole. These strips can be seen through the fiberglass in the bottom picture above. With the strips in place, I had to make a form to use to lay up the fiberglass. I used blue foam and just carved it to shape with a disc sander. You can see those forms in the top picture above, or in the top picture of the intercooler/intake setup. Once the foam was carved, I put a layer of plastic on top of it so that the fiberglass wouldn't stick to it, and then layed up 2 layers of fiberglass inside of the airbox. Once that had cured, I layed up another layer outside of the airbox, using a lip to help give a mechanical structure in addition to the bond to hold the fiberglass when the vacuum gets pretty high. I don't have a picture of that, but it should be pretty easy to do if you've followed this far. I also cleaned up the fiberglass a bit.
There were a few more modifications that I had to make that I don't have pictures of. After installing the intercooler, intake, and airbox, I found a problem trying to get the AC condensor back in place. So once again I pulled out my Dremel tool and cut away what I needed from the cool air intake to get the condensor to fit. When I went to flush the radiator, I found that I couldn't get a screwdriver into the plug very easily, especially when I tried to put the plug back into the hole. But after two minutes with the Dremel cutting away about a square inch of plastic, it went in just fine.
So if you're planning on installing a Koyo radiator in a stock 3rd generation RX-7, be prepared to do a little more work than just a simple replacement. Don't be too intimidated by it, though. This was the first project I ever did with fiberglass, and it wasn't too hard. Of course, I did have the advantage of working for an aircraft company where I could ask questions of our composites technician. But if you're the type that does your own work on your car, especially modifying a sports car, I'd imagine that laying up fiberglass is not something that would discourage you.
I hope this write up helps. If you have any questions, send me an e-mail.